Overview
Aquarium controllers centralize monitoring and automation for reef systems, allowing reefkeepers to track parameters, control equipment, and respond to changes more consistently. Their real value lies in coordination and awareness rather than replacing hands-on husbandry.
At their best, controllers make a reef easier to observe and safer to manage. They can turn equipment on and off, record trends, send alerts, and help one device respond to another. They do not make a tank self-maintaining, and they cannot correct bad husbandry by themselves. Think of a controller as a reliability layer: useful for consistency, early warning, and coordination.
What a controller can monitor
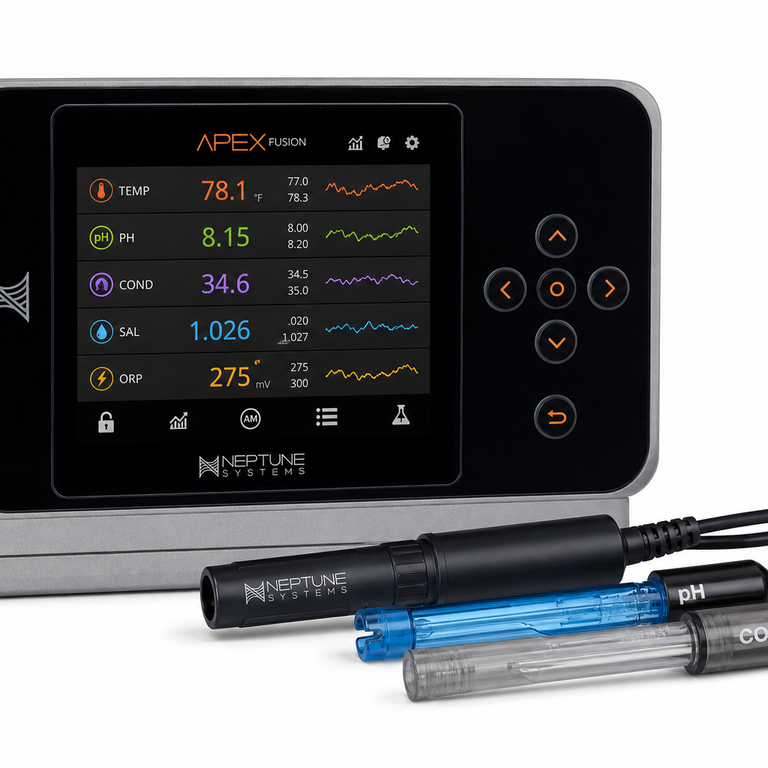
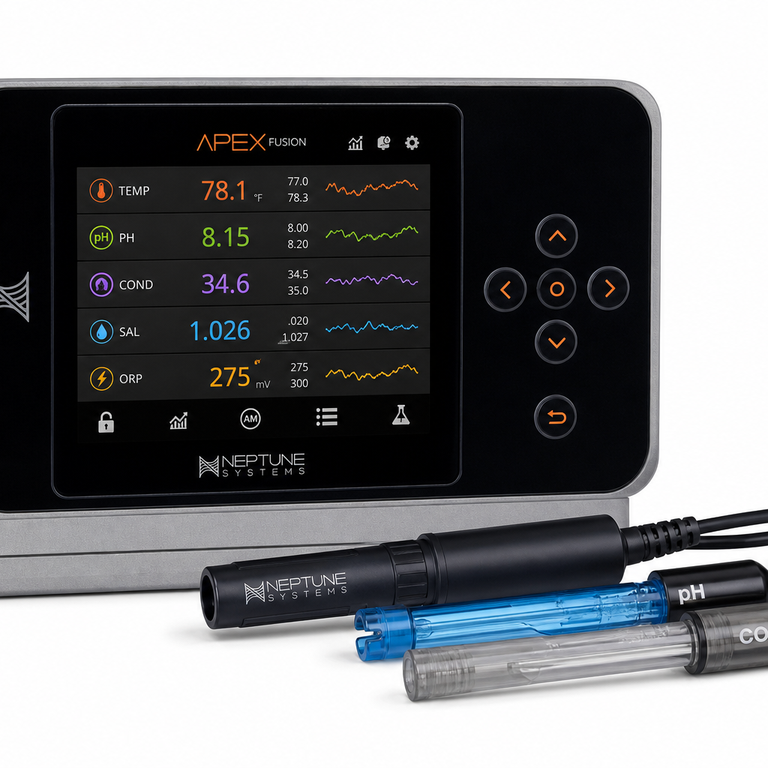
Most controller systems start with monitoring. Common inputs include temperature, pH, salinity or conductivity, oxidation-reduction potential, leak sensors, water-level sensors, optical sensors, flow sensors, power monitoring, and sometimes automated alkalinity or nutrient testing through add-on modules.
Continuous readings are most useful as trends. A single pH number matters less than the daily pattern. A temperature probe is most valuable when it shows a heater sticking on, a chiller falling behind, or a room-temperature swing before livestock is stressed. Salinity and leak sensors are useful because they can catch failures that happen while nobody is watching.
What a controller can control
Controllers commonly manage heaters, cooling fans, chillers, return pumps, skimmers, dosing pumps, refugium lights, auto top off systems, leak shutoffs, feeder schedules, power outlets, alarms, and maintenance modes. Some systems can also coordinate lighting, flow pumps, automatic testers, and network-connected equipment.
Control is most useful when the rule is simple and the failure mode is clear. Turning a heater outlet off when temperature rises too high is useful. Shutting down an ATO pump when a high-water sensor is triggered is useful. Pausing a skimmer during feeding or water changes is useful. Complex chains of rules can become harder to understand and harder to troubleshoot.
Common components
A controller setup may include a head unit or hub, power bar, probes, probe holders, expansion modules, leak sensors, water-level sensors, dosing or testing modules, network connection, app access, and notification settings. The most important pieces are usually the least glamorous: reliable power connections, secure probe placement, clean cables, and alerts that reach the keeper.
Probes need stable placement away from bubbles, dosing outlets, heaters, and stagnant corners. Cables should have drip loops. Power bars should be mounted away from splash zones. Labeling each outlet sounds minor until something goes wrong at 2 a.m.
Useful automation versus unnecessary automation
Useful automation reduces repetitive mistakes or catches failures early. Good examples include heater redundancy, temperature alerts, leak alerts, ATO limits, dosing schedules with safeguards, feed modes, return-pump maintenance modes, and alerts for devices drawing unusual power.
Unnecessary automation tries to remove judgment from decisions that still need observation. A controller should not chase pH with aggressive dosing, make large chemistry corrections without testing discipline, or hide a maintenance problem behind a clever rule. If a rule would be dangerous when a probe drifts, a sensor gets dirty, or Wi-Fi drops, simplify it.
Setup and calibration basics
Set up the controller in stages. First connect monitoring and confirm the readings make sense. Then add one control task at a time. Record baseline temperature, pH, and equipment behavior before writing aggressive rules. Use conservative limits at first and test each outlet, alert, and fail-safe manually.
Calibrate probes according to the manufacturer's schedule and solution requirements. Rinse probes between calibration fluids, avoid contaminating bottles, and replace old calibration solution. After calibration, compare readings against a trusted secondary test or thermometer when possible. Do not assume a new probe is correct just because it is new.
Alerts and failure planning
Alerts should be specific, actionable, and rare enough that you do not ignore them. Temperature high, temperature low, leak detected, return pump off, ATO ran too long, dosing container empty, and power lost are examples of alerts worth receiving quickly.
Plan for controller failure too. A heater should have its own thermostat in addition to controller control. An ATO should have physical limits, not only software rules. Critical life-support equipment should fail in a state you understand. If the controller loses internet, reboots, or stops responding, the tank should remain safe long enough for you to intervene.
Maintenance and probe replacement
Controllers need maintenance like any other reef equipment. Clean probes gently, inspect holders, confirm sensors have not shifted, review logs, test alarms, update labels, and check that maintenance modes still match the equipment plugged into each outlet. Replace probes when calibration becomes unreliable, response becomes slow, or readings drift repeatedly after cleaning.
Do not let a controller become invisible. A monthly review of alerts, graphs, and outlet behavior can catch patterns before they become livestock problems.
Common mistakes
The most common mistakes are trusting uncalibrated probes, writing rules that are too complicated, putting all safety decisions behind one sensor, ignoring alert fatigue, mounting power equipment where it can get wet, and failing to test what happens when something is unplugged.
Another common mistake is using automation to avoid looking at the tank. A controller can show that temperature is stable, but it cannot tell you whether a fish is hiding, coral tissue is receding, a pump is clogged with algae, or a snail has blocked a drain.
How to choose a controller
Choose a controller based on the jobs you actually need it to do. For a smaller reef, temperature control, ATO safeguards, leak alerts, and simple outlet control may be enough. Larger or equipment-heavy systems may benefit from power monitoring, dosing integration, additional sensors, and expandable modules.
Look at reliability, support, availability of replacement probes, ease of programming, alert delivery, local control during internet outages, and how well the system fits the equipment you already own. A simpler setup that you understand is usually safer than a powerful setup you are afraid to change.